Friday, August 31, 2012

Yeah it's Friday

  What a week, it's been a long exhausting one as that. We received news that we are going to be able to close on our forever home today! I can't wait to fill it with all my pinterest finds and create so many memories with our little family. After we sign I may not be posting as often, we have lots of renovations to do before we move in. I do have lots in the works to share though so I will get them as much as I can.
  Did anyone see the link party? It was my very first one, I had no idea what it meant so I just gave it a whirl and was chosen. So I married a craft blogger started not long ago to give the male perceptive on craft blogging, he is truthful and doesn't hold back on his opinion. Makes me wonder what my husband thinks about the things I make but he never really says. You can find the link on the Time Flies post if you would like to check his blog.
 So since my daughter was born I have always been an early bird when it comes to holidays, I tend to get a tad bit excited. I have started working on the kids costumes, Jenesis mentioned she wanted to be a bat. Once she decided there was no going back, I then set out to figure a matching one for her brother when she said the he should be batman. I thought it would work cute together and may be the only time I can get them to have coordinating outfits for Halloween. So I will have a tutorial of what I've come up with sometime in September so be sure to have an eye out for it. Any-who I am set off to have a wonderful day and I hope everyone does as well, Happy crafting!

Thought for today

Wednesday, August 29, 2012

Time Flies

I've been mocked Round it goes where it stops nobody knows! Time is what we can never have enough of and when we are having fun we don't know where it went to. I'll admit I don't have the best time management when it comes to working on my projects, because it is always "One more minute". I could keep going, sigh someday I will get it down.
This little project might not help me mange but it is a cute way to tell the time.
I had most everything on hand but here is a list of supplies
•10 inch embroidery hoop
•clock mechanism
• 12 assorted or matching buttons
• coordinating fabric
•cardboard or foam board
•needle and thread
•quilt batting

First, take your embroidery hoop and trace it on your cardboard. When you cut this out you need to cut 1/2 inside of your line. You will be making this in layers. Take your coordinating fabric and quilt batting place it in the hoop. Now you can apply your "numbers" aka buttons in place. To have even spacing I first did 12,3,6 and 9; fill in the remaining numbers accordingly.Now you need to make a hole in the center of your fabric and cardboard so you will be able to insert your mechanism. There will be directions for the clock mechanism on how to take apart & to place it in. Insert through all layers, push in your remaining fabric for a clean edge. Great thing about the hoops the tightening clamp makes for a good hook for hanging.
Tick-tock now you have a clock, Happy creating!

 *Note: I did my first link party from SIMACB I've been mocked


The jars have it

Happy Wednesday! I hope everyone's week has had a great beginning and you are getting lots done. I have been impatiently waiting for good news on our house and maybe a new little one entering our family. I have been more distracted than normal. I have so many things I'd love to make just not the resources so I could. I have given myself a goal of a crafty wish list things I'd like to make. In no particular order they are as follows

  • Fabric banner
  • Christmas wreath
  • kids craft
  • concrete stepping stone
  • antique redo under $10
  • Electrical spool turned chair
  • finish my quilt 
 I have tried to rack my brain to come up with ideas that no one has seen, which is hard because lots of awesome DIYer's already have. So I will work with what I know for the time being as I evolve my own crafty niche. If you have any suggestions let me know I am always wanting to try something new.

So onto today's craft, I love jars I have a collection of new-old styles that I decorated my kitchen with, I sadly do not have a pic at this time to share. Lately I have been saving all spaghetti jars, pickle jars and even artichoke jars. I've started using as storage in my craft space, but it will not do having them plain.
I have drip painted one upside down and gave it a handle, button loved another it holds my glue sticks. Another hugs a small amount of my large button collection, I have one that holds my retired spools that have yet to be dedicated to anything yet. I had a new one that I decided to make into a light glob for Halloween. Whew jars galore and I am still looking for ideas of things to do with them.

What you need for this little tut is a jar, muslin or cream fabric strips torn, modge podge and an image you want to use. I wanted something halloweeny so I choice a witch hat.
This is all really easy only takes a little while to assemble and dry.
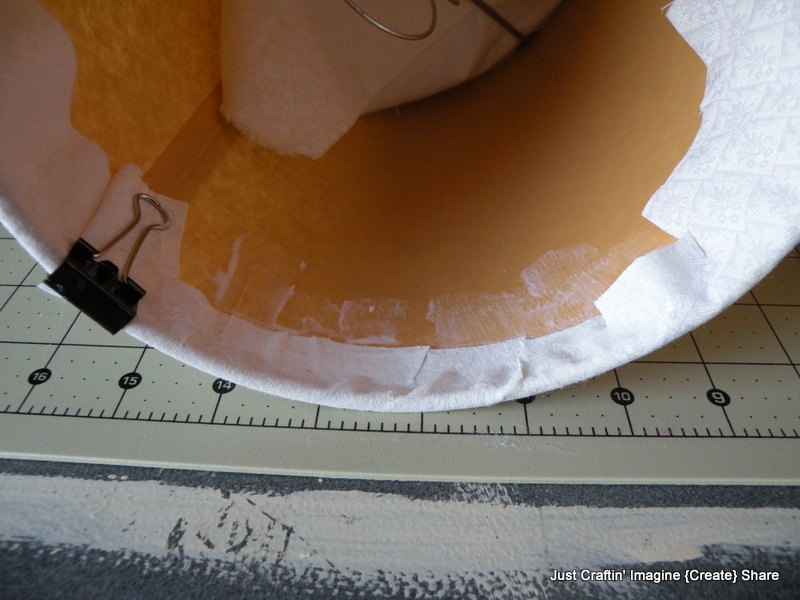
Take your strips any size apply glue to the jar and on top of the strip itself. Wrap till covered completely, it took 30 minutes or so to dry completely. During that time I free handed the image I wanted with permanent marker to a 3x5 inch square.

 I changed the date per Wikipedia that told me the start of the gruesome tales of the Salem witch trials. So after the muslin was dried I applied the image the same way as the strips. I covered the top with jute twine to finish it off. It was very simple and could be done with other materials scrapbook paper etc.

I'm still learning everyday little more about photography.I wasn't sure how to take "a in the dark photo" so I just went for it, turned out better than I expected. I can't wait to decorate with the little gem in our new home. What have you made a jar into before?


Have a great day, happy creating!


Monday, August 27, 2012

Basket case

What a weekend, the hubs surprised me with a night away at a themed hotel near us. It wasn't quite what we expected but the overall time we spent together was great, sort of our last hurray before we start working on our new home.
   After we came home I set to work on today's tutorial a fabric wrapped basket. So I discovered one that we had used in our wedding, it will become a resting place for my shears and such in the craft area.
Before: I didn't care for the white wash on this so I was a perfect candidate for revamping
 This was a fairly small basket compared to some so I didn't need alot of fabric for it, I had this awesome plaid that ended up being just enough to cover it all. You will also need foam board or cardboard, either works great along with your trusty glue gun, this is a no sew project.
Trace bottom of the basket


You'll want the inside piece to be a little loose, when you add the fabric it'll fit snug.


If you wanted to, do an ironed pleat before you start gluing it would make an awesome affect once finished. I didn't really have a rhyme or reason to my method I just wanted it covered as best as I could. My mom actually taught me how to do this, I also could have put a lid on it picnic basket style but I wanted it open.
                                                                                 
Your fabric should be at least 2x as big, do a dry test before gluing

glue the 4 corners first then stretch/fit as you go


Here's what it'll look like after wrapped now for the inside base


Wrap/glue your cut board in fabric and glue to the inside of the basket


I couldn't leave the handle just blah so I wrapped it as well, gluing as I went


I finished it off with a scrappy flower, How's she look?


   I was so ecstatic with how it turned out and I love love this fabric as well. It makes a wonderful spot too keep the shears in reach and it's quite stylish too. You can use this method covering multiple sizes of baskets, I don't recommend this for any outside use though. You just may have the recent garage sale find that needs a little TLC laying around.
  I hope this leaves you with a new outlook on different things you could do to a basket. Later this week I will show you what I've done with glass jars don't throw them out, always great for a rainy day project. See you then.

Friday, August 24, 2012

Harvest the fall

Oh the cooler weather was a tease, I want it back. Now it's toasty out, oh well fall will make is come back soon...I hope. So after testing out the witchy woman I had the itch to make a prim pumpkin, I've seen several pictures and set out to make one of my own so here is a tutorial for you.

First cut out your pattern with light colored muslin or canvas from the pattern.
Primitive Pumpkin Pattern

Sew 1/4 inch seam on each petal, lay one on top of the other to sew.


Leave a 1/2 inch gap at the top for your stem and stuff till satisified
Cut foam/cardboard for inner foundation piece and felt for the other, glue together then stitch onto bottom.
After the bottom is stitched here is what it should look like, using small branch or dowel rod insert and glue.
Use a running stitch to close the opening around the stem.

Now you can grunge it up, I used a 1:1 water acrylic paint, cover with orange and let dry. After dried I made a coffee stain. Instant coffee and a little water make an awesome vintage look. I left some open areas from the orange so it would seep deeper in the fabric giving the worn look. Once dried I sanded some edges, added jute twine to give the indention's wrapping like a present then burlap covers the bottom. There are so many ways to decorate one of these adding leaves, raffia or faux flowers even.


I adore anything prim it's so real to me, others may see it differently though. I really enjoyed making this and plan on making a whole little family. Hope everyone had a fab week and you have an even better weekend, If you decided to try this out I'd love to see the result. Toodles and Happy creating!

Wednesday, August 22, 2012

All stitched up


As promised I did start working on my quilt again, I had stopped just short of getting all the blocks put together. I am making a king sized so this puppy calls for 195 blocks! Here's the link if anyone is interested any giving it a try Shuffle Quilt. Sadly I have not gotten it finished and it will still take me some time, but I still thought you all would be interested to see the version that I am making. I'm using a chocolate brown for the inner/outer boarder around the blocks along with the binding. Then for the smaller boarder a coordinating blue that's in my blocks. I can see if coming together but it is very tedious, sigh one step at a time.


But this wouldn't be a craftin post with out a tutorial of some kind. My mother in law had this old lamp that was destined to become something awesome with a little help from yours truly. In honor of quilts, this lamp will become "All Stitched up". For this challenge I wanted to use things I already have, like most crafters I needed spray paint, modge podge and fabric scraps.
Before you get to far if your using an older lamp just give it a slight dusting to allow things to stick properly. I first, eyed the measurement to cover the shade completely. I did a dry run first, tapping the fabric and rolling it to get a smooth application I left a couple inches extra then I will cut it later. You don't absolutely need them but if you have some binger clips they will help greatly to keep the fabric from slipping.

Do small sections at a time applying modge podge directly to the shade, stretch, smooth out and apply a binder clip when needed. When you get back to where you started fold it over a apply more glue for a clean edge. So now you need to clip the inside curve and modge podge it. It will look like this after.If I wanted to I could leave it just as is with the basic but I couldn't have that so I decided to make my shade look as if I stitched it. I applied different shapes of coordinating fabrics.I continued until all the spaces were filled up, allowed to dry completely then applied my stitches. I left the top and bottom edges with frills I thought the rest had enough character for the look.I plan to use it in my craft area, yellow is very inspiring to me also very cheerful. What do you think? I hope everyone has a bright day!


Monday, August 20, 2012

Feeling Witchy

   I hope everyone had a wonderful weekend. It's getting colder, I feel the chill and all those fall lovies are creeping in on me. Apple spice, pumpkins, hay rides, Halloween I am looking forward to the changes that are coming for the year and in my personal life. We are in the process of buying our forever home, I'm ready to get back to us. I am forever great full my mother in law has allowed us to invade her peace and quiet. Things are moving along and come next month we will be homeowners again, and I can create all those fantastic home ideas I have pinned ( jumping for joy and rubs hands together victoriously).
   I picked up this awesome magazine called Create & Decorate:Decorate primitive crafts. If you head over to check it out they do have a few free downloads. But you'd have to get the magazine to see the full tutorial on this gorgeous lady. Oh my, I've gone to heaven the patterns in that beauty had me drooling let me tell ya. I dog eared several I'd like to try out for fall, the first one that caught my eye was the Witchy woman. I decided to give her a whirl.
  I've made like two other stuffies before and I'm still practicing my ladder stitch. Practice makes perfect, I have been busy making creations for others I needed to take sometime to myself and create just for me.This witch was fun longest part for me was getting her to dry so I could do the next step, I've never painted on muslin before but I enjoyed this so much. Here was Gerdy as she was drying, I named her thought it fit well.I think I like the coffee stain over tea stain, seams to work faster and it has a pleasant aroma.


 Gerdy's pattern didn't call for a broom but what witch is complete with out her clean ride. I got together raffia, uncoated wire, and a stick. Yep, a stick from the backyard. I cut the stick about 12 inches, plugged in my trusty glue gun, and glued 6 inch bundle of raffia to the end of it. Then wrapped two strands of wire around. Viola' and you have a spiffy broom fit for a...um well witch. Gerdy is intend to hang on the door, I'll integrate the broom somehow.


So here she is folks, I'll primed and ready for her grand entrance. I can't wait to display her, until now I think she'll hang out with me. Not sure what I'll tackle next I do have a quilt I haven't been very motivated to work on, I'm so afraid I will mess it up so I kind of just stopped working on it. It's my first quilt and it's a king sized to boot. I may have bit off more than I can chew. Alas I will probably work on it next and let you see the progress. But first I desperately need to clean and organize my craft area it doubles as a play room, not very effective until we get into our new home it will have to do. That's about it for today, I hope you all are having a wonderful start to your week and happy creating!


Thursday, August 16, 2012

Part 2: DIY pillow mattress

Whew I managed to get one last photo of the finished result before my camera informed me it was exhausted and promptly shut itself off, how rude. Anywho I was able finish the tutorial while the kiddos were napping, go me! So on with the show...

As discussed your supplies needed are as follows 4 standard pillows, king size flat sheet though a queen would do, matching thread. I wanted to personalize this for my son so I picked up some fishy fabric to applique his name along with the fusible web.

I booted up my word so I could get a transfer of Jaces name. Reminder for newbies: You must do the name in reverse in order for it to be read correctly when finished.


I like to leave my paper on the the fabric as I cut out easier to move around with the scissors. I also cut out two fishes to go along with his name.I like this heat-bond well enought just needs a little more heat time but it does remove from the fabric with little effort. I normally get by the yard. I almost forget to put this on once I got started.


isn't it so cute?

So I laid the pillows out so I could figure out measurements. The pillows measure 20 x 26, so I cut the length of the doubled in half sheet to 83. That gave me room for the pillows themselves and 1/2 inch seams topp/bottom. To save myself time I tried to use the manufactured seams on one side less work quicker result. I made a 3 inch pocket on one side secured with pins using my handy straight guide and ironed it.

So after to fix your hems nice and pretty, sew the top/bottom edges. Now you'll just have a large pocket with a small one on the edge. Turn it all around so your rough seams are now inside. Now you  measure starting at one end measure 20.5 a total of 3 times. These will be the pockets your pillows will sit. Working with large portions of fabric can be a pain, I recommend having a large work around preferably with hardwood floor easier to cut on.


Before you sew pillow pocket finish any appliques is desired
I lucked out and had a wonderfully burnt orange thread to sew this all it blended well.

Tada, I was so happy with this I tried it out. Almost fell asleep too. I have a feeling some other little ones in my family may be getting these as well. I can't wait to give this to my son he will love it and the fishy's. When the day comes I will be sure to tell everyone about it. I hope everyone has a stellar weekend and happy creating!

*Finished measurements are 82.5 length and 53 wide. Seams are 1/2 rolled and ironed.

Wednesday, August 15, 2012

It's getting cozy

Today was back to school for my daughter, she went right into class without looking back. One more year and then to kindergarten, which she is very excited about. My son and I had some one on one, we did some shopping for his upcoming birthday. Jace likes to fight over his sisters' foam princess couch, that gave me the perfect idea. I came across a pillow mattress on pinterest awhile back then No Rest for the Creative  took the pattern down which was understandable it is becoming a pattern you can purchase. But I've found another similar that used a twin duvet cover from Ikea, I guess I'm behind I have never been to Ikea and I have no idea where to find one near me.

  So in the next few days I will have a tutorial and some pictures for you. I plan to use a king flat sheet, we never use ours unless it's making a fort with the kids. I picked up 4 standard pillows @ 2.50 back to school from my local Walmart.

Hope you come back to see my progress and the finished result, Happy creating!

Tuesday, August 14, 2012

Cool School

It's that time of year for new shoes, sharpened pencils and colorful backpacks. I hope everyone is ready after hitting the good deals and stocking away for this years' projects. I was commissioned from my daughters pre-k teacher to make some chair bags similar to this. She had one for me to pattern off of that another teacher had. She just asked that it have a double pocket. The chair bag is great organization for the younger ones and it keeps things out of reach when they need to pay attention. This patten has a finished size of 11 1/2 L and 14 1/2 W fits a child's size chair back.
*Disclaimer: I do not own the above picture, it is an example only. But the below DIY pattern was composed by yours truly. After I made a few I decided to make up a pattern for anyone else. This pattern would be easily adaptable for larger chairs. I may even make one for my craft chair. Supplies: piece of fabric measuring 33L by 15 1/2 W another piece that measures (small pocket)7L by 15 1/2 W coordinating thread Seam allowance on the hem total 1/2- fold at 1/4 and again for a clean edge(If you have a serger it would be save some time)
I ironed/pressed all edges before I sewed I was able to use the pressed lines as a guide later. Next I started on making the main piece that goes over the chair and creates the larger pocket.
You will fold over creating a pocket that will measure 11 1/2 inches. See above picture. Then you will fold the remaining fabric up this large pocket will be 9 inches.
Press the folds so you have a guide line later or pin in place. Since I was using a canvas once it was pressed it had a nice clean line to follow. On to the small packet, you need to hem this with 1/4 inch rolled and pressed it will measure 6 inches finished.
I have this nefty little helper for seams. A Straight folding template from The Scientific Seamstress.
It is a tremendous help and I use it constantly. So a this point you can lay everything out to ensure everything meets up and you can pin anything in place.
I used 1/4 to stitch the smaller pocket into place. After the edges are sewn and the small pocket is in place you will, turn the back of your big pocket inside out so you can so it, making a sandwich withe the bottom edge open.
Sew 1/2 inch seams, double stitch at the top/bottom to ensure tight hold. Turn it inside out and iron flat.
I didn't have a chair to test these out on but as soon as I get a photo, I will let you see. What do you think? Leave a comment and let me know. Happy Creating!